Share:


วิธีการสร้าง Connection แบบ Dial-up ของ Windows7
ที่มา และขอบคุณ ...
http://support2.truecorp.co.th/detail.aspx?document_id=3031. คลิก Start ซึ่ง Windows7 จะเป็นสัญลักษณ์ ดังรูป

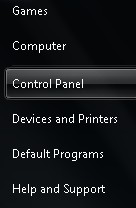
2. คลิก Control Panel
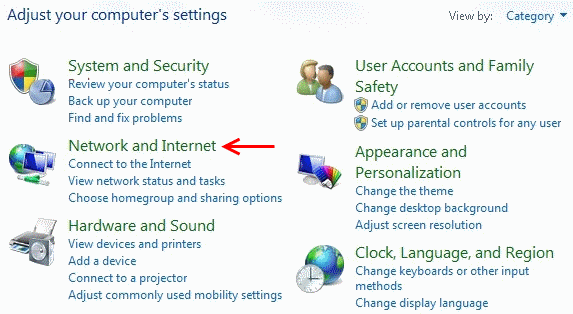
3. คลิก Network and Internet
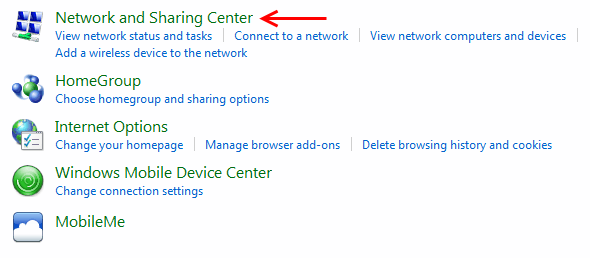
4. คลิก Network and Sharing Center
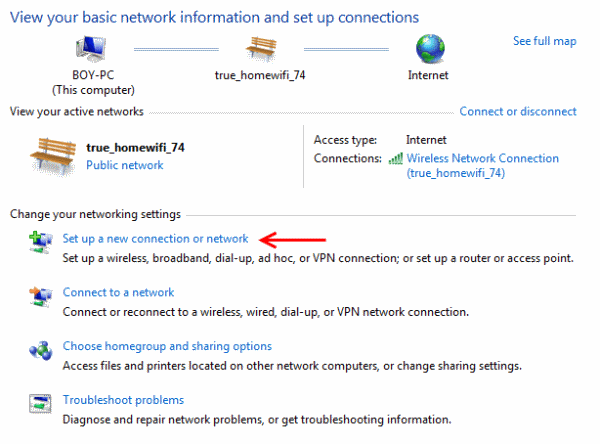
5. คลิก Set up a new connection or network
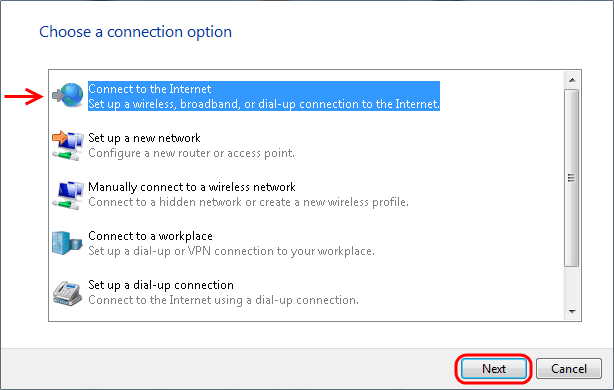
6. คลิก Connect to the Internet
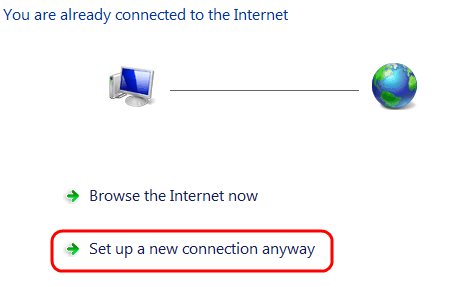
7. คลิก Set up a new connection anyway
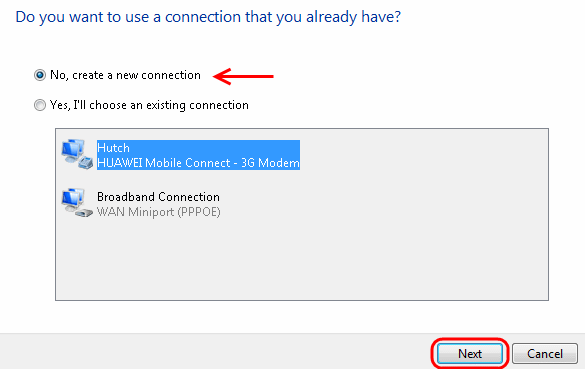
8. คลิก No, create a new connection
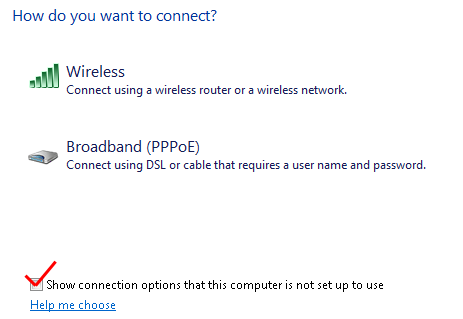
9. ถ้าไม่มีหัวข้อ Dial-up ให้ทำเครื่องหมายถูกหน้า Show connection options that….
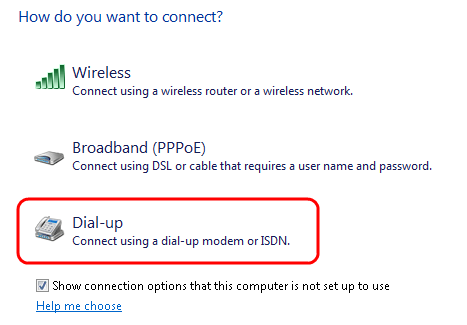
10. คลิก Dial-up
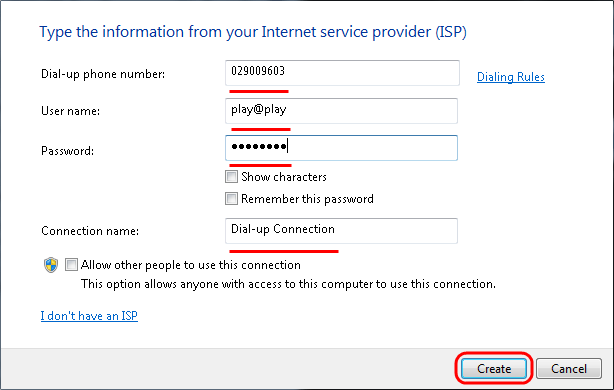
11. กรอกข้อมูล ตาม package ที่ซื้อมา เช่น Dial-up phone number , User name , password และกำหนดชื่อ connection
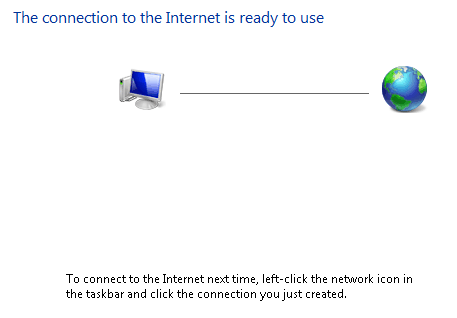
12. Connection พร้อมใช้งานแล้ว
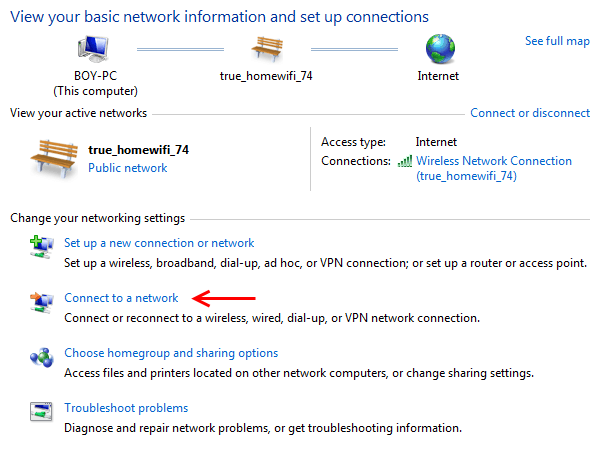
13. สามารถ คลิก Connect ได้ที่ Connect to a network หรือคลิกที่ task bar ได้เลย
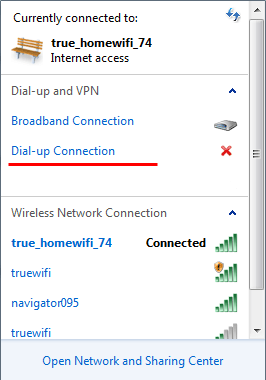
14. จะมี pop up ขึ้นที่ task bar มุมขวามือ ด้านล่าง เลือก Connection ที่ได้สร้างไว้ *
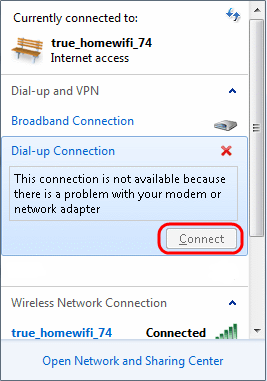
15. คลิก Connect *
* หมายเหตุ : ภาพตัวอย่างไม่ได้มีการลง driver modem 56kbps ไว้ สัญลักษณ์จึงเป็น X

 :
: